Are you ready to elevate your video content to a whole new level? In this vivavideo tutorial, we’re taking a deep dive into one of the most user-friendly yet powerful video editing apps out there. I’ve tested countless mobile editors, and VivaVideo consistently stands out for its sleek interface, rich features, and surprising depth—all packed into your phone or desktop. Whether you're a seasoned content creator, TikToker, or just someone who loves playing around with visuals, this guide is tailored for you.
In this review and tutorial, I’ll walk through VivaVideo’s strengths: trimming clips, dynamic filters, slick transitions, text overlays, chroma key functions, mixing audio, and much more. By the end, you'll know not just what VivaVideo can do—but exactly how to do it. Let’s jump in!

I. Introduction and App Overview
A. VivaVideo Key Features
VivaVideo brings a full-fledged editing suite to your pocket or desktop. Available across Android, iOS, and Windows, it boasts:
Basic edits: trim, split, merge, reverse, adjust playback speed
Visual flavor: vivid filters, glitch/neon/blurs and stylish border effects
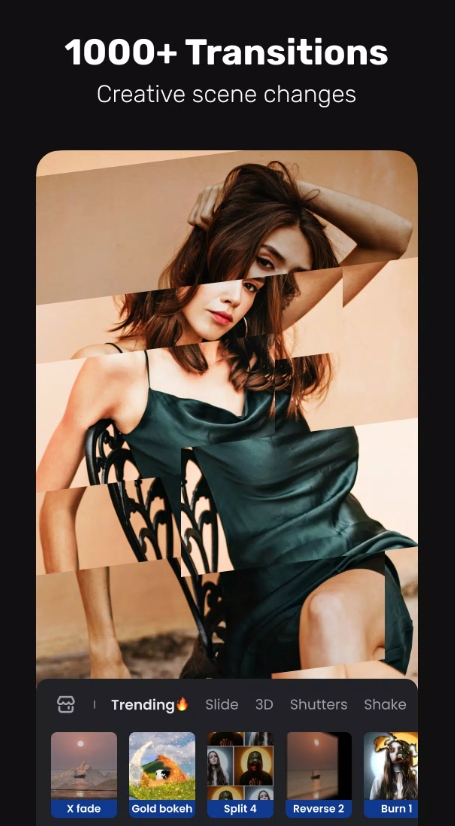
Transitions: seamless options like dissolves, slides, and 3D flips
Creative power tools: chroma key, motion tracking, and keyframe animation
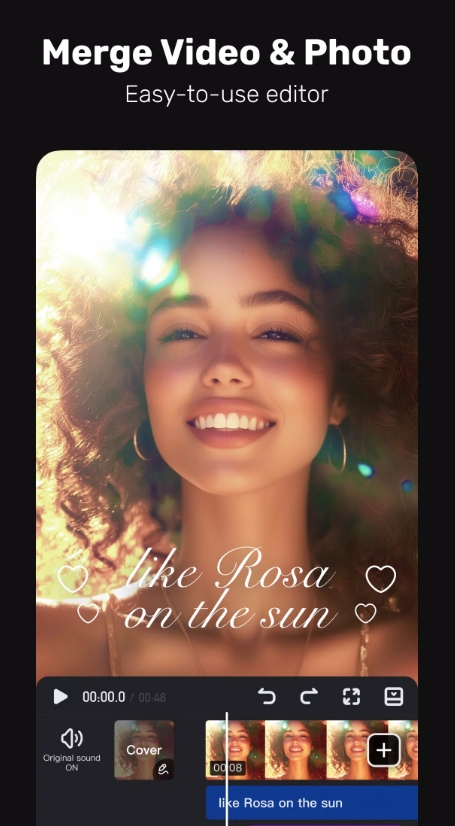
Text & Graphics: from subtitles to animated titles, stickers, emojis
Audio mastery: import music, record voiceovers, add sound effects with beat-sync
B. Why Use VivaVideo
Whether you're new to editing or savvy with the craft, VivaVideo hits a sweet spot. Beginners appreciate the drag-and-drop simplicity and portrait-first approach, while advanced users can dig into chroma keying, masked motion tracking, and speed curve controls. It’s versatile, intuitive, and capable of outputting share-ready content in minutes.
II. Installation and Setup
A. Platform Compatibility
Mobile: Supports Android 8.0+ and iOS 13+.
Desktop: Windows 10 version (though slightly behind mobile in feature updates).
You can find it on Google Play, the App Store, or via the official website for the Windows installer.
B. Initial Configuration
After installing, grant access to camera, mic, and storage. You'll then be invited to log in via email or social accounts, which is optional but unlocks cloud sync. A quick onboarding tutorial launches at first use—covering layout navigation, first edits, and core tools—all in a few popups you can skip if you're confident.
III. Basic Editing Functions
A. Clip Management
This is where editing begins:
Splitting & trimming: tap a clip on the storyboard to cut it precisely.
Merging: long press clips to drag and reorder or merge them.
Reverse: flip playback direction—fun for quirky effects.
Speed & volume: hold a clip to access speed ramping/sync and audio fade/slides.
The app supports layered editing too—stack voice, music, and sound effect tracks.
B. Timeline Navigation
The portrait-mode timeline is intuitive:
Pinch-to-zoom on the timeline for frame-level precision.
Swipe left/right to scrub through clips quickly.
Track layering: add voice, background music, sound fx, and visuals on separate layers.
IV. Creative Effects and Filters
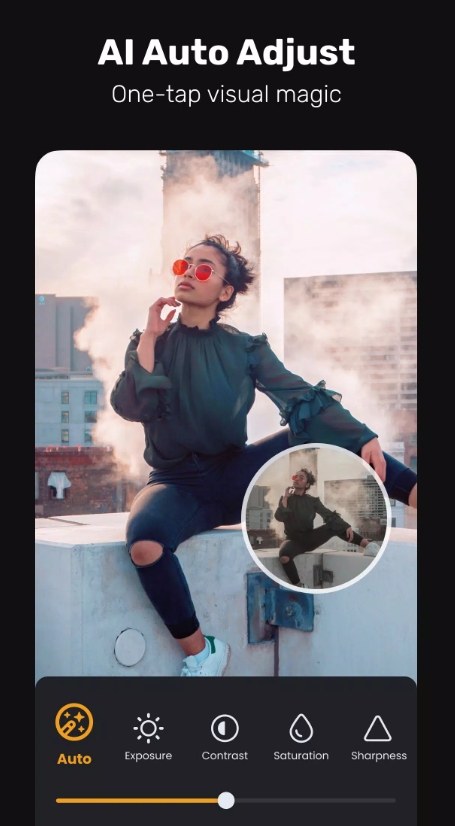
A. Visual Enhancements
Unleash your creativity here:
Filters: dozens of moods—from cinematic to dreamy layers.
Overlays & borders: including glitch and neon glow options.
Blur, vintage and color-tuning sliders: for precise fine-tuning.
B. Transitions & Animations
Classic transitions: dissolve, wipe, slide, cube/3D flips, and more.
Keyframe animations: create motion paths—for text, images, or clip movement (in VIP version).
V. Advanced Editing Techniques
A. Chroma Key (Green Screen)
Go beyond basic edits:
Shoot or import a green screen clip.
Tap Overlay > Chroma Key—pick the green tone.
Adjust edge smoothing and spill suppression for blending.
Swap in your background—video, image, or gradient.
A few apps ignore detail here but VivaVideo nails refinement for most DIY studio work .
B. Motion Tracking & Masking
Attach graphics to motion: select your sticker or text, tap “track”—it will follow the subject around.
Masking: reveal portions of footage through animated masks or overlays synced via keyframes.
These tools deliver editing flexibility typically reserved for desktop software.
VI. Text, Titles, and Graphics
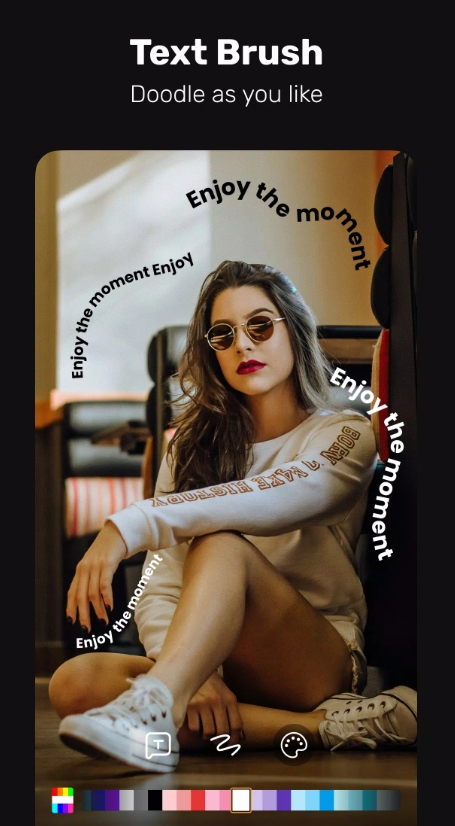
A. Text Overlays
Adding text is versatile and fun:
Choose between titles, captions, or subtitles.
Pick fonts, colors, and apply stylized templates.
Animate entrance/exit with bounce, fade, slide or dynamic effects.
B. Stickers and Emojis
Sprinkle personality on your video:
This includes animated GIFs, emojis, or custom graphics.
Use pinch/rotate gestures for resizing and placement.
Apply keyframe motion to set them in motion or make paths.
VII. Audio Editing and Music Integration
A. Background Music
VivaVideo’s built-in library includes copyrighted-safe tracks.
Import your own music too.
Trim, position on timeline, and add fade-ins/outs.
Beat-sync tool auto-snaps clips based on tempo.
B. Voiceovers and Sound Effects
Record narration on the spot with in-app mic.
Adjust voice levels, duck music tracks under speech.
Add whoosh, click, pop, and boomer sound effects—timed to entries, transitions, or punches.
VIII. Exporting and Sharing
A. Output Formats
Choose your final quality wisely:
Resolutions: 720p, 1080p, up to 4K (premium).
Formats: MP4, MOV, or save short clips as GIFs.
Set frame rates and bitrate where supported.
B. Social Media Integration
Once polished, hit “Share.” VivaVideo includes one-tap publishing to TikTok, Instagram, YouTube, and more. You can also toggle app-branded watermark on/off (VIP unlocks that).
IX. Productivity Tips and Shortcuts
A. Workflow Optimization
Save templates and projects to reuse transitions, overlays, or timelines.
Use built-in project presets for different platforms (e.g. 9:16 for Reels).
On desktop, keyboard shortcuts speed up editing (e.g., Split = S, Delete = Del).
B. Backup and Recovery
Enable auto-saving to cloud—prevents losing work if app shuts or crashes.
Access project history to restore earlier versions—handy if you go too wild on edits.
X. Troubleshooting and Support
A. Common Issues and Fixes
Crashes/lag: clear cache, reduce resolution, close background apps, update to latest version.
Export errors: often resolved by switching file format, lowering bitrate, or simplifying effects.
Green-screen glitches: tweak smoothing and tolerance until edges look clean.
B. Help Resources
Tap the Tutorial icon inside the app for guided lessons.
Check the FAQ hub for troubleshooting or quick tips.
For VIP users, chat/email support guarantees ~24-hour response. Community forums on Facebook, Reddit, and YouTube are active and helpful.
Who Should Use VivaVideo?
Content Creators & Influencers: Speedy edits paired with polished effects to wow your followers.
Casual & Beginning Editors: Intuitive tools allow for pro-level results without steep learning curves.
DIY Studio Fans: Chroma key and motion tracking open worlds of creativity—even on mobile.
VivaVideo stands tall as a powerful mobile video editor that blends simplicity and sophistication. Its portrait-mode interface is accessible, and advanced features like chroma key, motion tracking, keyframe animation, and multi-track audio far exceed the usual app scopes. Premium upgrades unlock 4K export, watermark removal, and extended capabilities, but even the core app remains valuable.
If you crave creative control in your pocket, want to make share-ready edits fast, and appreciate a friendly learning curve—VivaVideo delivers. It isn’t a full substitute for Premiere Pro or Final Cut, but for mobile-first editors demanding more than Instagram filters—it's one of the best tools there is.
Whether you're editing your first video or exploring your hundredth, this vivavideo tutorial gets your projects polished and professional. Have questions or want a feature-by-feature walkthrough? Just say the word—I’m happy to create a deep-dive on anything you like!